A closet adds additional storage space to your home and can help keep things organized and neater! Yes, this guide will take you through each step, whether you’re building a small reach-in closet, a large walk-in closet, or even a master closet that is custom-designed.
Includes information on tools and materials needed and step-by-step instructions to build your own closet. From closet sizes to closet rods, this guide has the basics, including how to properly secure your closet frame with a stud finder and how to make sure your door header is properly positioned. Let’s start with how to construct a closet..
1. Step-by-Step Checklist for Closet Planning
- Assess your closet space and storage needs.
- Choose the type of closet: walk-in, sliding doors, bifold doors, or a custom closet.
- Measure your closet walls, ceiling joists, and floor space to make sure everything fits.
- Design layout for electrical, hanging rods, and shelving.
- Think about your preferred closet doors, like bifold or sliding, and ensure the door opening suits your layout.
2. Prep Work: Getting the Space Ready for the Closet
The prep work is the meat and potatoes of any closet build, and if you miss a step in preparation, you could find yourself in a heap of trouble with your build later.
Necessary Prep Steps:
- Remove the furniture or obstacles from the area.
- Use a stud finder to find wall studs and ceiling joists so that the closet structure will be secured.
- If building against an existing wall or in an existing room, be aware of where the room’s door header is and allow enough space for door installation.
- Obtain a building permit and an electrical permit (if necessary) before starting to work on the electrical.
3. How to Construct a Closet: Building the Frame
First, finish your prep work. Then, start building your closet’s main frame. Use wall plates, top plates, and framing to create the structure.
Framing the Closet:
- Start with cutting the bottom and top plates to the correct measurements.
- Attach both wall plates to the floor and ceiling with construction adhesive and nails.
- Attach vertical studs to the top and bottom plates to frame the closet walls.
- Be sure the wall studs are evenly spaced and plumb.
Choosing the Right Materials for a Durable Closet
The quality of materials used in your closet affects its durability and appearance. Solid wood is a good choice for longevity. Plywood offers a budget-friendly yet sturdy alternative. You should avoid cheap particle boards, as they tend to weaken over time.
For closet rods, choose metal or thick wooden rods to support heavy clothes without bending. If installing shelves, consider adjustable options with strong brackets. Using high-quality materials proves that your closet remains sturdy and stylish for years to come.
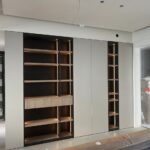
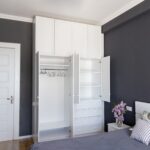
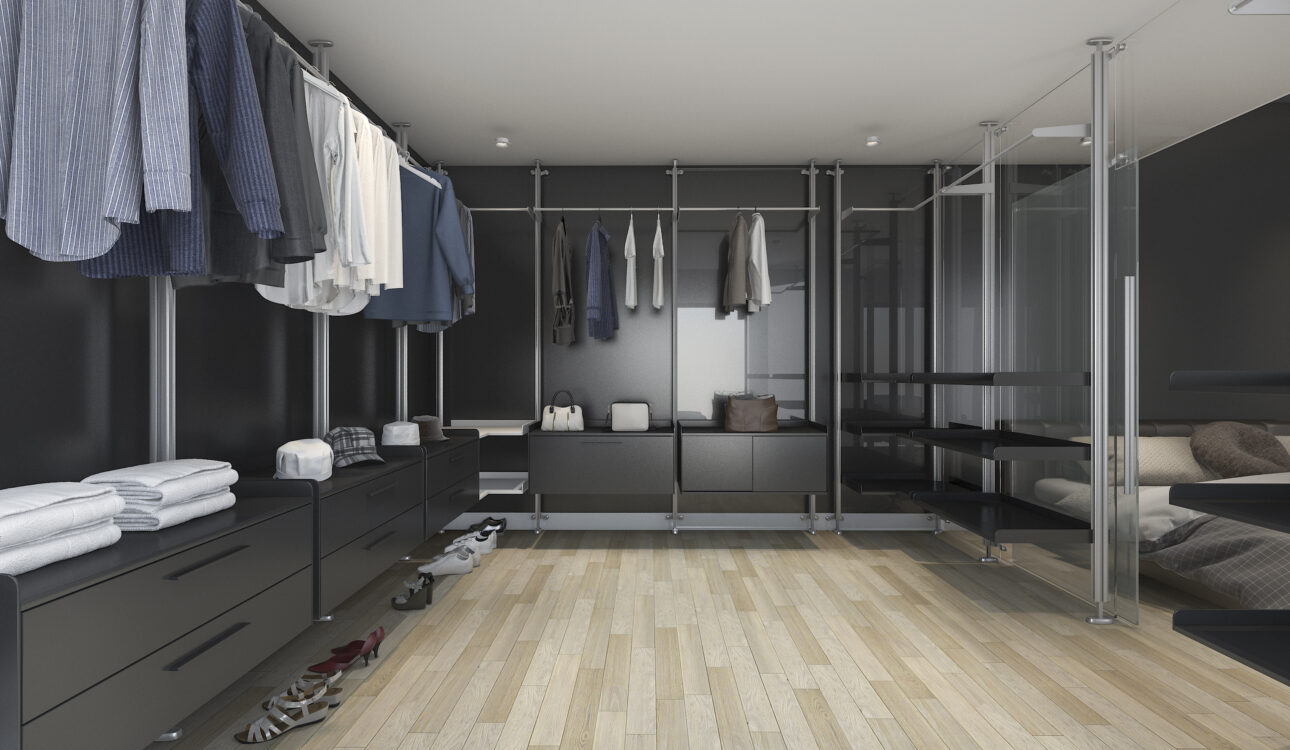
4. Creating a Walk-In Closet: Maximizing Space
When you make a walk-in closet, you get more space. Use it perfectly to fit your storage needs.
Things to consider for your walk-in closet:
- Make sure the layout flows well with foot traffic and accessibility.
- You need to add racks to the closet wall to store shoes, purses, or folded clothes.
- Add hanging rods to hang clothes. Also, check they are tall enough to accommodate long items like dresses or coats.
- Properly use your space by using built-ins.
Creating a Closet That Matches Your Lifestyle
Your closet should reflect your daily habits and personal style. If you have a large collection of shoes, dedicate a section with racks or pull-out drawers. If you prefer folded clothes overhanging ones, add more shelving space.
Think about how you get dressed each day. Place frequently used items at eye level for easy access. If you share the closet, create separate sections for each person. A well-planned closet makes getting ready stress-free and keeps everything in its place.
5. Installing the Closet Walls
The frame for your closet is already built. And now it’s time to focus on attaching the closet walls to complete the structure of your new closet.
Wall Installation Process:
Put drywall or plywood panels on the closet walls. Use screws or nails to fix them. Make sure they stay flat and tight against the studs. If you want shelves, leave space for the brackets. If the closet has lights, cut holes for the wires.

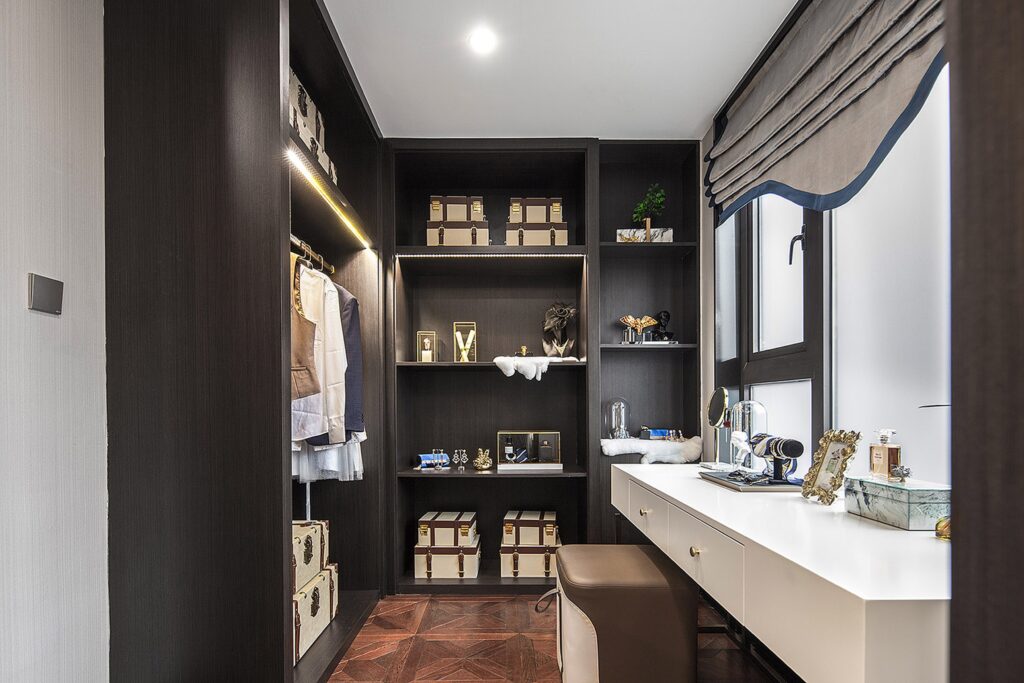
6. Customization for Storage Space: Bells and Whistles for Your Closet
A custom closet can help you customize your storage area. Also it can suit your aesthetic and needs with low shelves, drawers, or integrated closet organization systems.
Custom closet ideas:
- Include adjustable shelves for versatile storage.
- For drawers, install custom drawer units to store small items like jewelry, belts, and scarves.
- For shoes or accessories, install pull-out racks or baskets.
- If possible, design the closet with built-in elements like cubbies or sliding doors.
Smart Storage Hacks for Maximum Closet Space
A well-designed closet should not only look good but also maximize storage. One trick is to use vertical space efficiently. Install high shelves for seasonal clothes and low pull-out bins for easy access.
Another hack is using multi-purpose storage, like double hanging rods for short clothes or stackable bins for shoes and accessories. Drawer dividers help keep small items like jewelry and belts organized.
Adding hooks on the inside of doors can create extra storage for bags or scarves. Small changes like these can make a big difference in keeping your closet neat and functional.
7. DIY Master Closet: Space Organization
A DIY master closet allows you to organize your clothes and accessories efficiently while keeping everything easily accessible.
DIY Closet Organization Tips:
- If you can, use the same type of hangers also so that they look neat and tidy.
- Set aside sections in your closet for types of clothing, basal for seasonal formal or informal.
- Install hanging rods for various heights, like with different lengths of hangers.
- Make Use of Vertical Space with Niches, Shelves, and Hooks for Accessories (Think Hats and Bags)
8. Learn How to Install Closet Doors in Detail
Closet doors are really important, as they make your closet functional and aesthetic. First, you need to select your door style to accommodate your needs and aesthetics.
Types of Closet Doors:
- Bifold doors: A good choice for smaller closets where space is limited.
- Sliding doors: Great for wide areas and quick access to the inside of the closet.
- Hinged doors: A more traditional and elegant option — ideal for closets where the space allows for door swings.
9. How to Install Hanging Rods
- Place the top rod high enough for long clothes, such as dresses and coats.
- You should use strong brackets so that the rod is tight and does not slip.
- Add additional rods for shirts, pants, and skirts.
10. Top and Bottom Plates and more Keeping the Closet Strong
The closet is firm thanks to strong plates. So the top and bottom plates matter.
Steps to Install Plates:
- Fasten the top plate to the ceiling joists and align it with the wall studs.
- Nail or screw the bottom plate down to the flooring.
- Lay adhesive where the plate and wall touch.
11. Installing Closet Lighting
Good lighting helps you see better and use the closet easily.
Lighting Options:
- Best Use LED or recessed lights to save energy.
- Install motion-sensor lights in walk-in closets.
- Add pendant lights or sconces for a stylish look.
12. Final Touches: Shelving, Trimming, and Organizing
With your closet framework and hanging rods installed, the next steps are shelf installation, trimming, and organizing the closet interior.
Adding Shelves and Trim:
- Add shelves that can be raised or lowered to hold shoes, bags, and other accessories.
- Install baseboards and trim in your closet to make it look polished and complete.
- Cut trim pieces to size at corners and door openings with a utility knife.
13. Testing Your Closet Build: Double-Checking for Flaws
The final step in your closet build should be to test the structure to make sure everything is where it is supposed to be and all is secure.
Testing Tips:
- Ensure that screws and nails are affixed properly.
- See if the doors open and close freely.
- Look at the shelves and hanging rods. Make sure they are strong enough to hold your clothes and accessories safely.

Why Choose One-Closet for Organizing Your Closet?
One-Closet helps you keep your closet neat, stylish, and useful. Here’s what makes us special:
20+ Years of Experience and expertise in closet solutions and custom designs.
5-Year Warranty: Guaranteed durability on refinishing services.
Professional Closet Repairs: We have a skilled team for all types of closet fixes.
100% Satisfaction Guarantee: We ensure top-quality results for every project.
High-Quality Design & Materials: We combine style, functionality, and durability.
#1 Service Team: Trusted professionals delivering the best closet organization solutions.
Mistakes to Avoid
Building a closet is exciting, but small mistakes can cause big problems. One common mistake is skipping the planning phase. Without proper measurements, your closet may not fit the space or meet your storage needs. Always measure carefully and create a design before starting.
Another mistake is ignoring wall studs when securing the frame. A weak frame can make your closet unstable. Use a stud finder to anchor your closet properly.
Also, choosing the wrong closet doors can affect accessibility. Make sure the door style suits your space. Lastly, don’t forget lighting, poor lighting makes it hard to find things. Plan ahead to avoid these issues and build a sturdy, functional closet.
Conclusion: Enjoy Your New Closet Space
To learn how to construct a closet is a huge project. It requires thoughtful planning and consideration. For happier storage solutions, follow the steps below to create a closet that works and helps elevate your home.
Plan your build, do prep work, build strong closet walls, add custom features, install doors, and finish with the details. With thoughtfulness leading the way and execution being tactical, your DIY closet will be an achievement. Hope you enjoy building your new closet!
FAQs About Closet Makeover
How do I make sure my entire closet is sturdy?
Use a stud finder to locate secure points, fasten top and bottom plates firmly, and use toggle bolts where needed.
What are the best ways to hang closet doors?
Ensure the door header is properly aligned, use quality hinges, and follow step-by-step instructions for smooth installation.
How do I install closet rods securely?
Use heavy-duty brackets, align rods parallel to the back wall, and secure them with the screws.
What tools do I need for a closet makeover?
You’ll need a chalk line, utility knife, trimmer studs, hand tools, and possibly a licensed electrician for electrical cables.
Is building a closet time-consuming and expensive?
While it can be time-consuming, using home improvement stores for supplies makes it a lot cheaper. Proper planning saves time and cost.