A built-in media center is not where you just put your TV and other gadgets. It works to make your living room look gorgeous, stay clean, and work well. If you’d like a cozy family room or modern entertaining space, proper design is essential.
This blog will walk you through how to design a custom built-in media center for your home. Let’s begin and see how to create a media center that fits your style and makes the room better!
Benefits of a custom entertainment center
- Easy Integration: It looks good on your wall or room design.
- Custom Design: Ties in perfectly with the interior and color scheme of your home.
- Optimized Storage Space: Holds electronics, wires, and accessories.
- Added Value: Complements the exterior of your home with a touch of professionalism.
Why Invest in a Custom Media Center?
There are a lot of advantages of a custom media center when compared to factory-made furniture:
- Custom Fit: To fit your room, no bulky sizes or gaps.
- Enhanced Functionality: Cable management, adjustable shelving, and hidden storage.
- Beauty: Enhances your home decor, whether classic, modern, or country.
- Durability: Made of high-quality materials like solid wood or plywood for heavy use.
Step-by-Step Solution for Custom Built-in Media Center
You need to know what you want your media center to look like. Once you’ve decided, measure your wall to see how much space you have.
Think about where the center cabinet and speakers will go. Use boxes to mock up the layout before you build the whole thing.
Then cut and assemble the unit, sand the surface. Once you have the final look decided paint it to match your style.
Don’t forget to leave room for power outlets. This will be your new home for all your stuff.
Maximising your wall space and adding extra storage is key to a functional media centre. This page will help you design it to fit in with your home.
Whether you like minimalist or classic, this will give you the idea for the perfect space for your setup.
Step 1: Measure Your Space
Take the time to think about your space before starting your project:
- Measure the depth, height, and width of the wall.
- Consider architectural features like fireplaces or windows that may influence the design.
- Consider storage for items like books, board games, or DVDs.
Step 2: Choose Your Style
Your media center style should reflect the rest of your interior style.
- Modern Minimalist: Clean lines, neutral colors, and simple designs with painted or glass trim.
- Traditional Elegance: Rich wood color with elegant trim and face frames for a classic look.
- Rustic Charm: Wood with natural finishes paired with metal hardware for a rustic look.
Step 3: Plan Your Layout
A good layout will make your media center both functional and attractive:
- Use floating shelves to provide open storage or to display items like books and decor pieces.
- Add closed cabinets with cabinet doors to hide clutter.
- Add drawers to store small items like remotes or cables.
Step 4: Organize Electronics
Your electronics are the hub of your media center:
- Allocate space for your TV, speakers, gaming systems, and other devices.
- Use cable management products to hide cables but still maintain access.
- Use good ventilation to prevent electronics from overheating.
Step 5: Maximize Storage Options
Storage is always a consideration with any media center design:
- Include adjustable shelves for storing items of different sizes.
- Use deep drawers for heavy objects like blankets or board games.
- Use hidden storage compartments for cords and accessories so all is kept organized
Step 6: Add Lighting Features
Lighting can enhance both the form and function of your media center:
- Add LED strip lighting beneath a shelf or in a cabinet for a hip look.
- Use task lighting near the TV zone to enhance viewability when in use.
Step 7: Add Multifunctionality
A unit that a professional has built can be a multi-functional item:
- Add built-in seating with storage underneath for small spaces.
- Combine it with a desk area if you need a workspace in the same space.
Step 8: Cost Factors
A built-in unit doesn’t have to break the bank:
- Use cheap materials like laminate instead of solid wood.
- Use standard cabinet dimensions instead of bespoke dimensions.
- DIY some parts of the project if possible.
If you’re handy with tools, building a DIY entertainment center can be rewarding:
Steps to Build Your diy entertainment center:
- Use pre-made cabinets as the base.
- Add custom touches like paint or trim to match your decor.
- Include floating shelves for an easy-to-install storage solution.
Tools You’ll Need:
- Drill
- Screws
- Sandpaper
- Measuring tape
Step 9: Personalize Your Media Center
Make your media center unique by adding personal touches:
- Paint it in colors that complement your room.
- Display decorative items like framed pictures or plants on open shelves.
- Choose hardware that is consistent with your style.
Step 10: Add Technology
Technology plays a central part in modern media centers:
- Add receptacles inside cabinets for easy access.
- Use smart home features like voice-controlled lighting.
- Add built-in speakers for total entertainment immersion.
Step 11: Maximize Small Spaces
If you’re working with a smaller room, don’t worry! A custom built-in media center can still work beautifully. Here’s how:
- Go Vertical: Use the full height of your wall to maximize storage. Tall cabinets and shelves are great for saving floor space.
- Compact Design: Opt for a slim unit with fewer cabinets and drawers to avoid overwhelming the room.
- Multifunctionality: Make your media center double as another product, such as a bookshelf or fold-down computer station.
Common Mistakes to Avoid
Avoid these common errors when designing your media center:
- Forgetting Ventilation: Devices such as TVs and game consoles require airflow in order not to overheat.
- Overloading Shelving: Avoid stacking heavy objects on unsupported shelves; use proper face frames or brackets.
- Poor Cable Management: A tangled group of wires can have the potential to ruin the clean look of your media center. Use cable organizers or hide cables behind cabinet doors.
- Making the Wrong Materials Choice: Plywood or solid wood should match the decor of your house and hold up to use over time.
Maintenance Tips
Keep your media center fresh and functional looking with these tips:
- Dust Weekly: Shelves and electronics also get dusty, so dust them weekly.
- Clean Cabinet Doors: Wipe cabinet doors with a gentle cleaner to eliminate smudges and fingerprints.
- Reorganize Occasionally: Repack when your requirements shift, restock and store to maintain it organized.
Inspiration Gallery
Need design inspiration? Here are some stunning examples of custom built-in media centers:
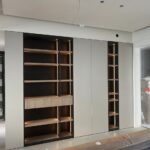
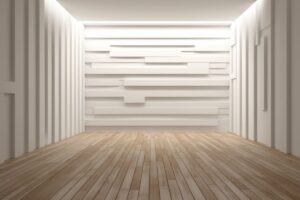
- Modern Minimalist: White furniture with floating shelves, LED lights, and hidden storage compartments.
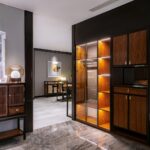
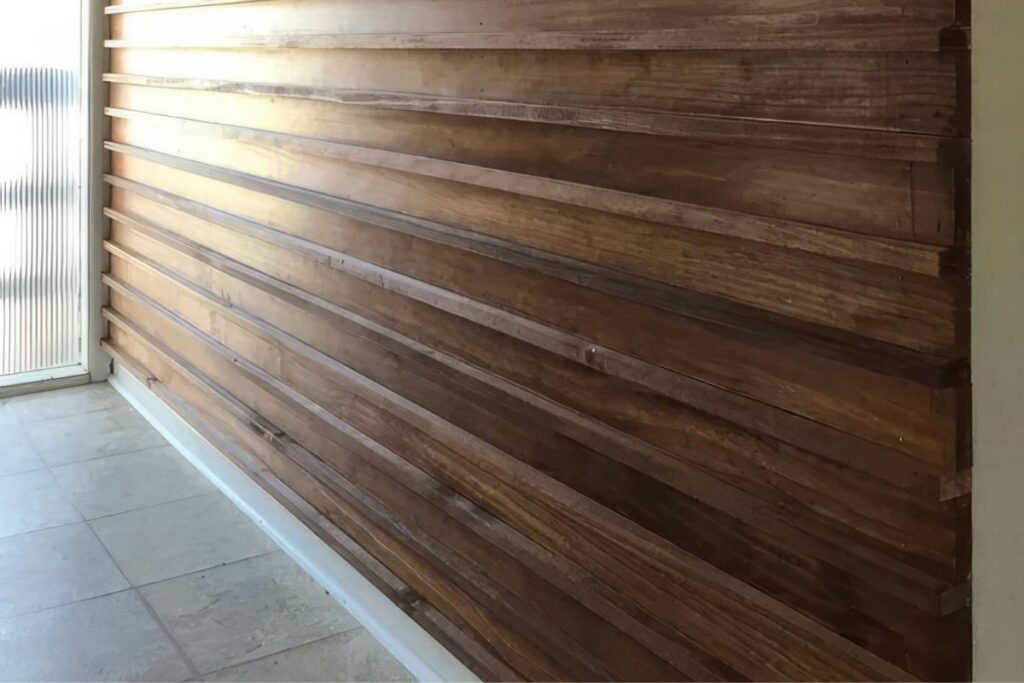
- Rustic Charm: Warm wood tones and black metal hardware are perfect for a family room.
- Family-Friendly Design: Large unit filled with many drawers and cabinets for storing board games, toys, and more.
- Built-In Bookcase Combo: Combine your media center with a bookcase for extra storage and style.
DIY vs Professional Installation
You can choose DIY or professional installation. If you choose DIY, first check the width of your space. Make sure all surfaces are flat before using screws to put everything together.
If you see a hole, don’t worry; just use filler to fill it. Taking time to measure is what really matters for a good result. In the end, both choices can give an amazing finish if done right
DIY Installation
- Best if you’re on a tight budget or a DIYer.
- Requires basic tools like drills, screws, and sandpaper
- It provides an opportunity to perform custom details like custom painting or trim.
Professional Installation
- Best if there are intricate designs or the units are of a big size and require proper measurements.
- Ensures quality craftsmanship and proper installation of items like cabinet doors and face frames.
- Conserves time and labor and still yields a finished product.
Why Choose One-Closet for Your Custom Media Center?
one-closet is the perfect partner in creating and installing your custom built-in media center. Here’s why:
- Customization Expertise: With over 20 years of experience, one-closet is an expert at creating customized storage solutions that fit your lifestyle.
- Wide Range of Services: Cabinets to wall wardrobes, we offer you everything you need for a clean home.
- Installation Services by Professionals: Our team ensures proper measurements, precise assembly, and flawless finishes.
- Full Warranty Protection: All services include a full warranty, plus a 5-year refinishing warranty.
- #1 in Custom Closets: Trusted for superior craftsmanship, quality, and long-lasting results.
Conclusion
A homemade entertainment center is a great way to add flair and functionality to your home. You can use a center cabinet with closed storage or open shelving for speakers, but the design is what sets it all up. Don’t forget to keep an eye out for details like drawer fronts and paint color to match your home’s style.
Think about where you are going to place the whole unit. Is it going to hold a TV, game consoles, or books? Put power outlets in the correct locations. Don’t forget closing holes and smoothing rough edges for a clean finish.
If you’re building it yourself, take time to measure everything, including the corners and the ceiling height. Use heavy-duty rails for support, and include clearance around electronics. If you do a stain finish, try it out first so that you get the right shade.
A DIY entertainment center gives you the perfect spot to put your house in order while adding a personal touch. If you’re using boxes or a nearby table as storage, this project has the ability to transform your environment completely.
FAQ about How to Design a Custom Built-In Media Center
What is the best wood for a DIY entertainment center?
Plywood is a great option because it’s sturdy and easy to cut. You can also use MDF if you’re painting it.
How do I cut it wrongly?
Cut a straight line using a circular saw and measure twice to cut.
Do I leave an allowance at the back for cables?
Yes! Drill a wee hole in the rear panel for wiring and cooling.
Can I mount my TV onto the unit?
Yes, just mount it securely. Use wall plugs if needed.
How do I finish it professionally?
Sand the edges, stain well, and ensure that all the parts are level.
How do I ensure my entertainment center will fit?
Measure your space carefully, including corners, and ceiling. Ensure that you double-check the square footage before building.